


In this tutorial I will show you an easy but very effective way to sharpen your photos. This technique is really useful, with a few easy steps you can "save" and improve those great shots that just came out a little bit unsharp.
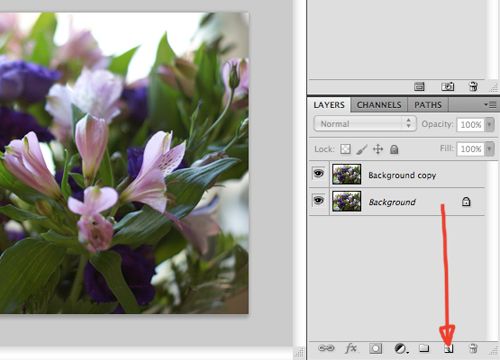
Ok, let's start. After you have adjusted your levels (learn how to do that here), go to your Layers panel. Make a copy of the Background layer by dragging it to the 'Create a new layer' symbol, next to the trash bin.
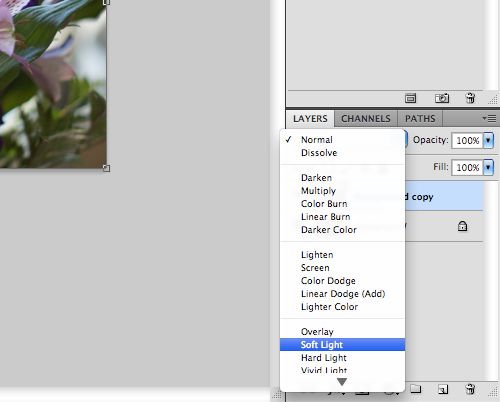
Click on the new layer and then click where it says Normal. Change this to Soft Light.
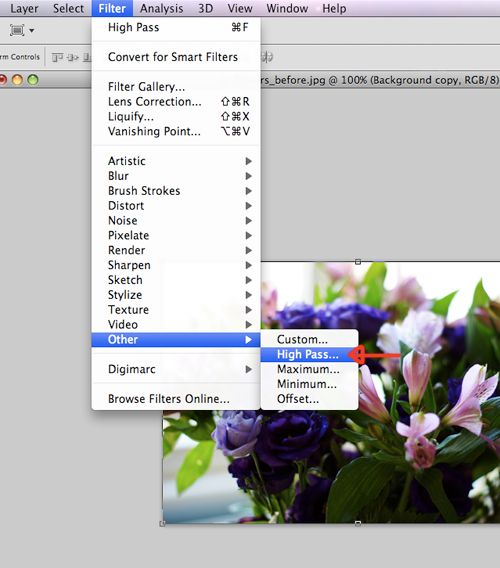
Now go to the Filter menu, down to Other, then click on High Pass.

Here you can adjust and preview the High Pass filter. You can play around and try a few different numbers here, but I personally find that somewhere around 10 pixels works best.
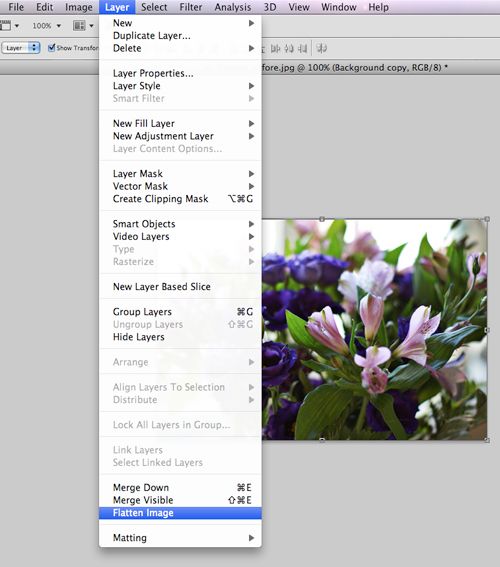
Go to Layer/Flatten Image, and you're done!
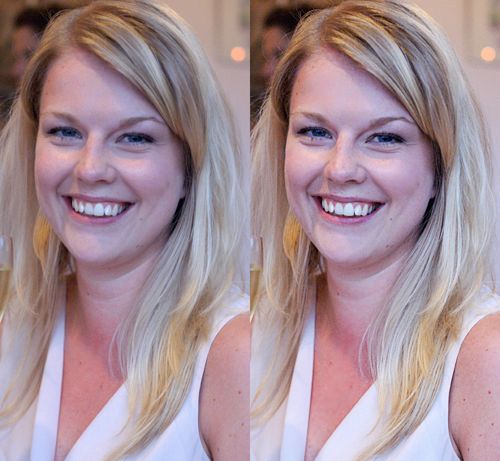
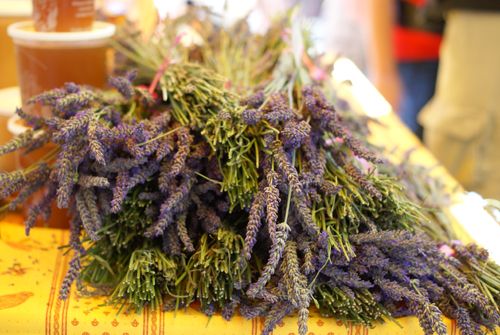
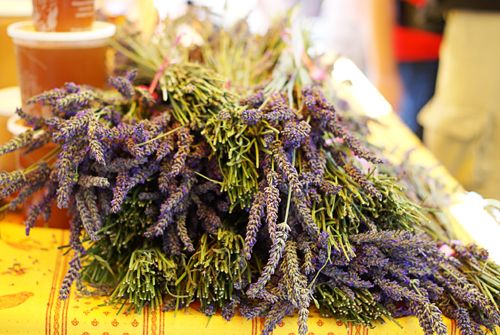
Below are a few more examples of before/after sharpening.


16 Comments:
thank you for this wonderful tip
Åh, tack för tipset. Jag kör alltid på oskarp mask, men detta var ju snäppet vassare!
thanks for the tips, Lisa!
Thanks so much for this great tutorial! I have a long way to go with photoshop but I think this will help a great deal. I need to go back and check out how to adjust the layers too. Thanks for entering my giveaway and following! So sweet of you! :) -Lo
LOVE IT!
Thank you so much, this tutorial is exactly what I needed today. I was taking photos this morning and most all of them came out to be looking dull and a bit blurry. I just tried you tutorial and ta-da ! photos looking much much better.Thank you!
Great tip! Thanks so much!
Thanks for the helpful and useful tip!!
Thanks for sharing nice tutorial..I have been looking information on how to sharp a photo..This tutorial has solve my concern to a great extent..
Hi.....I wasn't able to get this to work for me. (Maybe because I'm using Elements and not the full Photoshop program??)
I followed the steps, but when I went to the "high pass" filter, it said it could not complete the command because no pixels were selected.
Can you tell me what I'm doing wrong?
THANK YOU!! :)
how do i drag the picture over there?
@Lyssa:
I've never used PS Elements so I don't know if there are differences, but it might be that your copied layer isn't "selected" when you click on high pass, try clicking on the layer first so that it is highlighted in blue, then go to "high pass".
Let me know if that works!
@Anonymous:
Not sure what you mean by 'drag the picture' but if you mean how to make a copy of the background layer, just click on it, hold it and drag to the little symbol left of the trash symbol.
Hope that helps!
Thanks for this, I usually use the unsharp mask, so I'm about to boot up photoshop and see which works best.
Best photoshop tutorial on the web. Easy, straight to the point, no-nonsense, and come with great examples. You need to post more tutorials!
Thank you for this! You have made starting to learn photoshop less daunting!
Post a Comment
Thanks for your thoughts!
xo Lisa
Note: only a member of this blog may post a comment.