


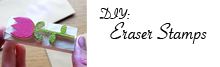
This tutorial shows you how to design and cut your own stamps from erasers. Of course you can use them for anything, but I show how to make them for invitation cards + envelopes.
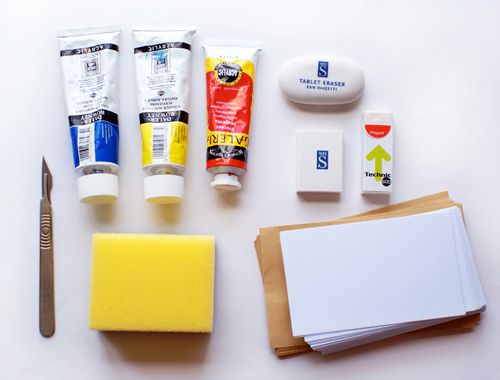
Materials needed: scalpel, water based paint, sponge, standard erasers, plain cards and envelopes.
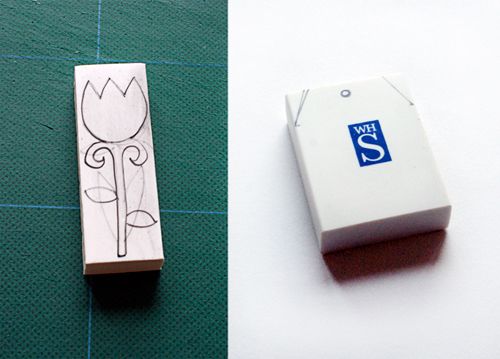
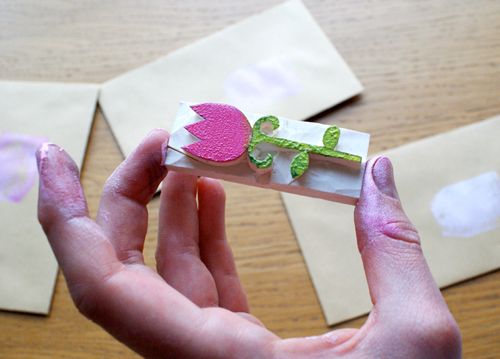
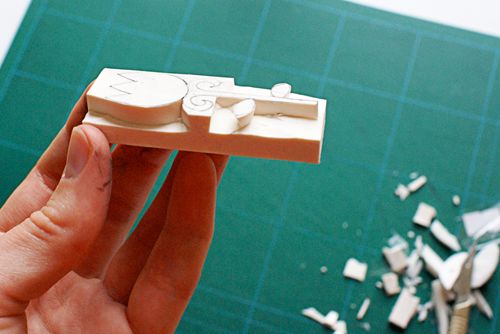
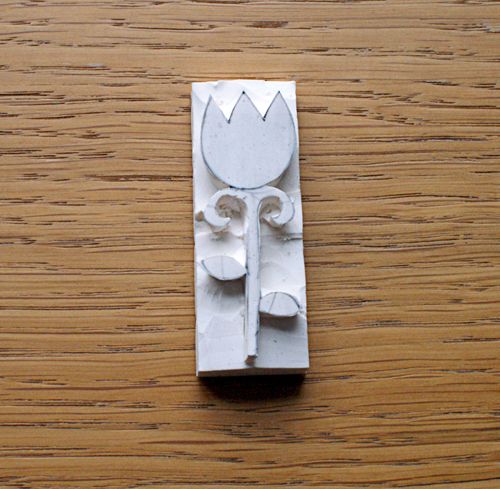
Draw out your designs on the eraser with a ballpoint pen, I'm making a flower and a label tag. Then carefully cut away everything that is "outside" of your design.

Draw out your designs on the eraser with a ballpoint pen, I'm making a flower and a label tag. Then carefully cut away everything that is "outside" of your design.
First cut along the drawn lines, then cut from the side of the eraser to remove the unwanted bits. Erasers are quite soft and easy to cut, but be careful and use a cutting mat to protect your table.
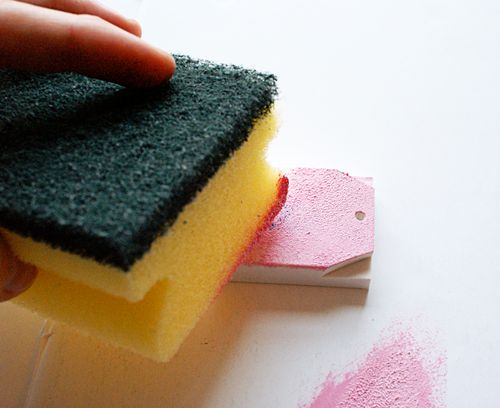
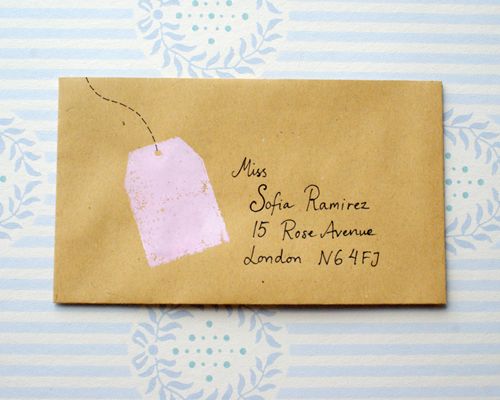
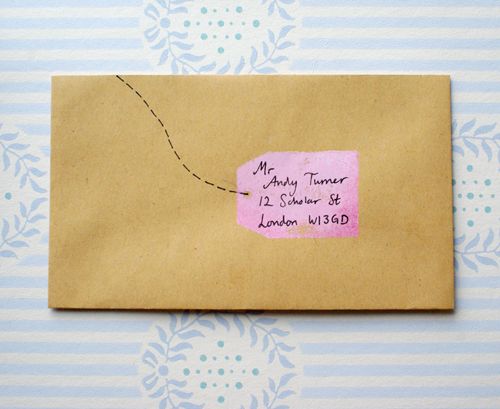
When you have your finished stamp it's time to add some colour, I used acrylics that I mixed with a little water. Dab the stamp with a sponge to create an even layer.
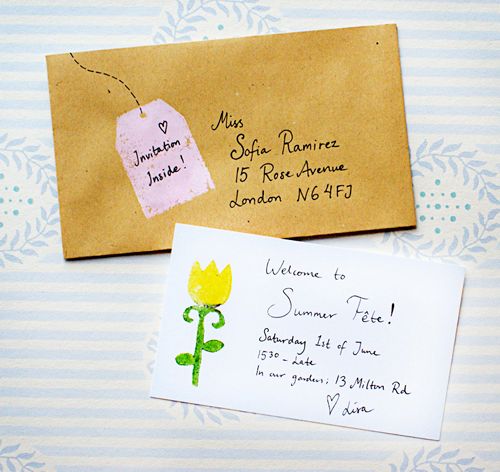
Now you can stamp away!
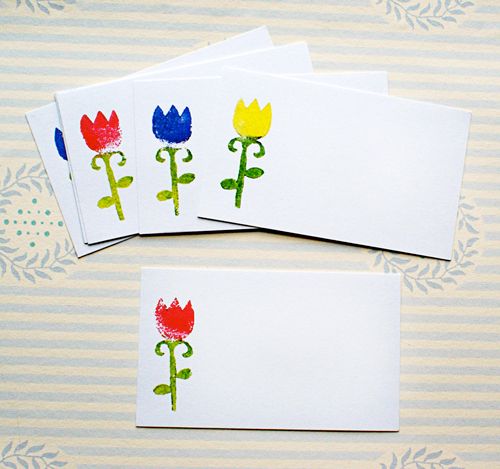
Now you can stamp away!
It's really fun to experiment with different colours and you can create beautiful gradients and textures. I also like to stamp on different kinds of paper: old wallpaper scraps, magazine pages or anything you can think of.


23 Comments:
Hopping over to that blog right now! ;)
Hope you're having a blast!
Miki.
Great idea!
♥ sécia
www.petiteinsanities.blogspot.com
This is incredible! What a simply but amazing idea. Doing it this weekend for sure!
LOVE it and so easy too! i think i might do this for a stamp for my shop! eek exciting! i love how creative you are lady!
xo,
cb
so cute i must try this!
Brilliant idea Lisa. I must give it a go.
YOur are great dear LIsa! thansk so much!
great and lovely idea Lisa!
I love that idea. I love how it has it's little imperfections too. Makes it very unique!
Loved the tutorial :)Such an amazing idea! Although I'm not sure I would be able to cut the shape right, hehe.
oh fun! i'm going to bookmark this so i can try it eventuallyyyy... i really want to make a little stamp to use in my packaging for orders :)
This is great! Can't wait to try!
very nice idea! I remember doing this with potatoes as a little kid! But an eraser would last a lot longer I'm sure! hehe
So cute!
Oh my gosh I've just flicked through pages upon pages of your blog and I'm in love. You have the greatest taste. The "first crush" animation just melted my heart! I will DEFINITELY bear this tutorial in mind when I get round to planning some wedding invitations soon =) x
We need the recipe of the cake, it looks so yummy. Thanks for sharing the beautiful photos and drop by me too, soon.
Cheers.
so cute!!
missy-daisy.com
Wow, what a great project! Thanks for sharing. Xoxo
Rocio R.
http://myfashiondolly.blogspot.com
You are so creative! So cute and easy I think Ill use this idea for my daughters birthday party! TY bunches!
loved it! went as saw how you did it...great tutorial :) can't wait to try it myself!
i just finished a shirt like this with little hearts! :D
Beautiful idea! I'm looking for ideas for my niece's birthday party and I think she and her friends would definitely enjoy making and using these! Too cute!
What a nice idea!!
Post a Comment
Thanks for your thoughts!
xo Lisa
Note: only a member of this blog may post a comment.